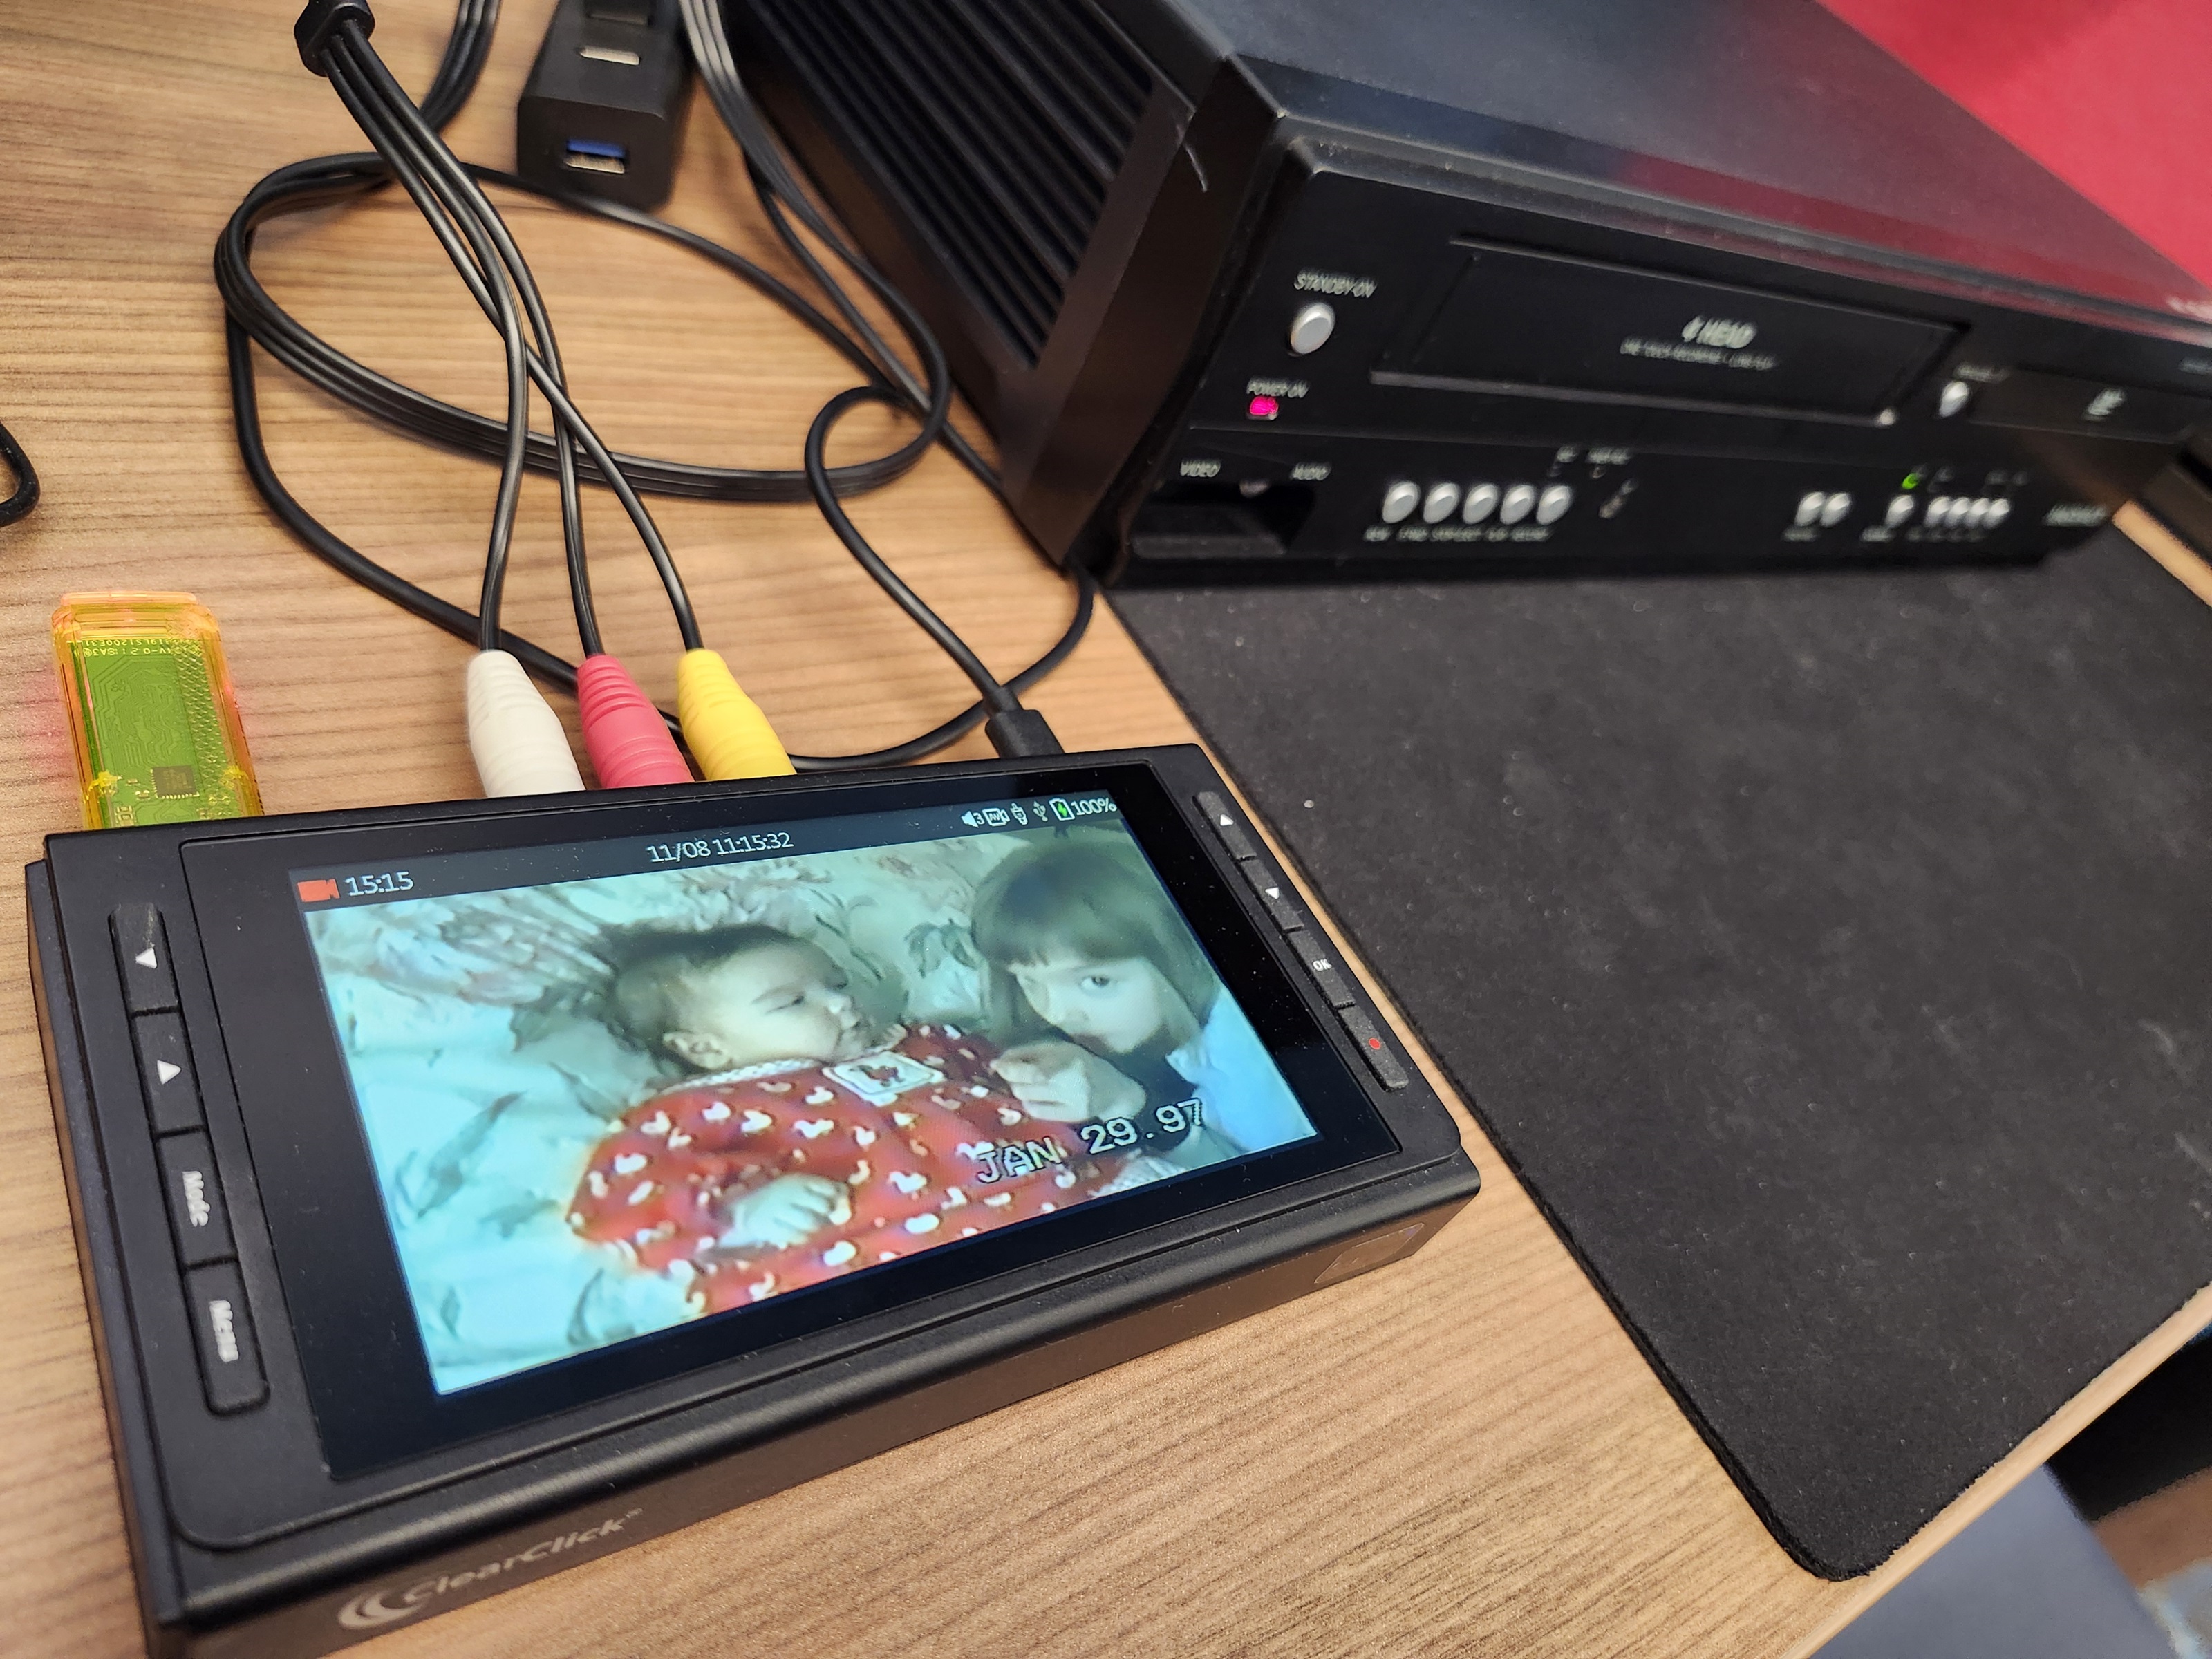
I spent some time at our county library the other day getting a VHS cassette of clips of my kids’ childhood digitized to an .mp4 file stored on a flash drive I brought along. Two libraries near me have equipment that digitizes old home movies in various formats, audio recordings, and slides, negatives and print photos—for free! Check to see if a library near you does this. The county library branch lets anyone come in to use their equipment during a pre-registered time slot, with staff providing instructions and help. The other library is independent and requires a library card to pre-register to drop off items that their staff will digitize and then notify when ready for pickup. Imagine that! Check with your libraries to see what services they offer these days—you might be amazed.
If you have a lot of video to digitize, you could buy a digitizer that hooks up to a VCR/DVD player. The county library uses ClearClick converters which can be bought online for about $200. The library has Wolverine converters to handle slides, negatives, and 35mm film fed through and saved one image at a time. I don’t know what is used to save audio, especially what’s on old audio cassettes. I have some CDs holding interviews with long-deceased immigrant relatives but my old computer has a CD drive so I could pull the files off that. Most computers these days do not have CD drives.
Some—or a lot—of us have carousels of slides I’d advise at least holding them up to a bright light and weeding out bad, faded, or unflattering shots, duplicates, and ones that don’t seem that important anymore. Save ones with meaningful people in them versus flowers and scenery you can otherwise find in an online search. Same with old print photos from pre-digital camera days.
To digitize print photos, all you need to do is take good photos of them with your cell phone! Crop the images, straighten them, fix the lighting—using your cell phone. Then connect your phone to a computer to download the images and organize them into folders, like by year or subject, or save to the Cloud.
With antique photos, once digitized and moved onto a computer, you can use programs already on your computer to fix them up further. I just open a photo and use Edit to fix lighting, increase color saturation or contrast, or turn a photo into black and white. Black and white can mask bad lighting and make faded photos look clearer, increase contrast as needed.
For even more photo fixes, opening in Paint (right click on the photo and choose) allows you to use an eyedropper icon (color picker tool) and a “brush” type (I use watercolor) to fix discolorations and remove those white spots common on old prints. Click on the eyedropper, click on a brush type, then move the eyedropper near to a discolored area, click in the area to pick up the correct color and then “brush” over the discoloration. Adjust the brush size with a slide bar on the left edge of the photo image. You can magnify the image for detail work with a slide bar at the bottom. I’ve even managed to remove fold marks going across a photo. You may need to mottle an area of foliage using different shades.
Technology is on your side now to make digitizing easier, so hope you didn’t throw out your old home movies or slides thinking they were lost to old formats or too expensive to send off to save to modern formats.