Writing Your Family History as a Booklet

If you are a decent writer, and even if you are not, you may choose to record family memories on paper. Computer word processing makes this job easy. Type up all the information you have on your family member, place the stories in some sort of order either by approximate date or by subject (like school stories), and try to verify historic facts and dates mentioned. Word processing programs will help correct spelling, grammar, and incomplete sentences, but try to either edit the work yourself or have someone else do it. Also, have a couple other people read the complete story to get an outsider’s viewpoint for suggestions on how to make it completely understandable and easy to read.

Now you can head to the copy shop to discuss your project. Full size 8 ½ x 11 inch paper is most economical. You will have choices in binding and type of cover. Ask the clerk about cost for adding photos if you are unable to scan and insert photos into the text yourself. Copying photos in black and white is fine, costs less than color, and goes well with the theme of old memories.

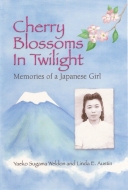
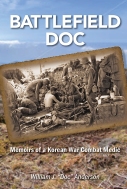
If using photos, and I suggest you do because visuals really add to the story, allow some blank pages and either have the copy shop add the photos for you or scan them in yourself. It is preferable to add a caption for each photo stating date, persons included, and any explanations. Type captions on the blank photo pages, experimenting for correct placement. You may use a photo for the cover also, experimenting for correct placement of the title and author information.

When you have your pages printed out and photos arranged where they should go, head to the copy shop with your project. Determine number of copies needed and go over the project with the clerk to ensure he/she understands exactly what you want. Do not hesitate to charge your relatives a reasonable cost to purchase a copy of your final product; after all, you have expended time, effort, and expense.

I have a spiral-bound genealogy/family story booklet that a relative on my husband’s side produced. Although it is not a perfected piece of literary work, it is a fascinating and delightful journey into the history of people we love. We are grateful for the efforts of this relative who so obviously put her heart (and a lot of time) into that project.

Posted in capturing memories | Comments Off on Writing Your Family History as a Booklet

Videotaping Family History Part II

The room where you interview should be well lit, the radio and TV off, the phone off the hook, little noisy kids out to a friend’s house. Ask if anyone wants something to drink. Have a list of questions ready and inform your subject(s) ahead of time about some of the things they will be asked. If you are both taping and interviewing, keep your voice moderate so you won’t appear to be shouting on the tape – in this case it is preferable to have another relative asking most of the questions. Be sure to start by stating the date, who you are and who you are interviewing. Then have your subject tell their date and place of birth, names of parents and siblings. From there you are free to chat away. You may need a time-out for battery or tape changes, or to switch to a different camera angle for variety. Keep the panning and zooming to a minimum.

When you are finished, you may edit your tape if you think it’s necessary and if that is something you know how to do. I would advise taking the tape in to a camera shop to have it made into a DVD which is a sturdier way to store the interview. You don’t want to cry because the tape got old or tangled up or the cassette broken. Wait for a sale – I got mine done for $26.00 at Wolf Camera.

The best thing about videotaping is that you capture the whole essence of your loved one who will then be able to speak to great-great-grandchildren they will never know. It is a beautiful way for their memory to be alive forever.

Posted in capturing memories | Comments Off on Videotaping Family History Part II

Videotaping Family History Part I

Videotaping is a fast and fairly easy way to record memories. Almost everyone has a videocamera, and many cameras these days are capable of very good editing. Even for the technologically incompetent, though, videotaping can be done easily and well enough. Know how to work your camera and practice panning across a room very slowly, zooming in and out very slowly, so you won’t make your video viewers seasick. When you are ready to tape, have the battery charged and a spare handy – or plug the camera into a wall outlet. Have one or two blank cassettes ready to use. A tripod would be great to have to keep the camera steady. I sat in a kitchen chair with my knees jacked up and the camera propped on my knees – it worked, but is a little uncomfortable for long sessions.

Decide where you want to tape and who all you want in the room. It may be fine to have just your subject there, it may be better to have a relative or two sitting with them to help facilitate conversation. Maybe you want to sit with that person and ask questions while somebody else tapes.

I ran the videorecorder while interviewing my husband’s grandmother and mother together in a dining room. My mother-in-law was a huge help since Granny was not a big talker. She knew some of the stories to ask about and helped Granny feel more at ease. My mother-in-law sat at the table fixing up a tray of lasagna, with my daughter quietly popping in later to help sprinkle cheese. It was a warm and homey scene that ended up capturing not only some of Granny’s stories, but also her daughter’s. I was very pleased.

Posted in capturing memories | 1 Comment